Watershed Analysis
The Hydrology Toolset

Background Information
The hydrology toolset is a spatial analysis toolset within ArcGIS that analyzes the overall flow of water over a topographic area. One of the tools within this toolset is known as the watershed analysis tool. This tool is used to delineate watersheds and define the characteristics of the drainage basin under investigation (ESRI, 2016). One of the reasons I have chosen this tool is due to my love of water. I grew up splashing around in the creek behind our house and sailing as a little girl. I then found work as an environmental scientist after graduating from Western Kentucky University, and as an environmental scientist for the company I was with, I had the opportunity to collect groundwater samples in various locations and work on a wetland restoration project. I then moved out to Whitefish, Montana where I was fortunate enough to spend my summer working for River design Group where I spent 10-day hitches on the Milk River surveying the flood plain for the Department of Natural Resources and Conservation and the Federal Emergency Management Agency. The biggest reason for choosing this tool was to educate myself about watersheds and hydrologic modeling since this is something that has yet crossed my academic career.
There are a variety of problems that this tool can solve, or analyze, such as addressing water resource issues like determining the health of an ecosystem and pinpointing water contamination sources, predicting geologic hazards due to flooding events like landslides and changing river patterns, and extreme erosion (ESRI, 2014). There are many other scenarios this tool can be used for, but to stay on task, the rest of this paper will introduce the ideas and concepts behind the data that the tool uses, the specific purpose behind this tool, and toolset, as well as the outputs the tool produces. Next, the paper will discuss in greater detail the specifics about each type of data that is required and the theory behind each input parameter, as well as how to interpret the results. Once there is a solid understanding of what to expect from the tool, a thorough explanation of how to use the tool will be included, followed by a summary of everything that has been discussed in this paper and concluding remarks.
Conceptual Overview
The watershed analysis tool is part of a larger toolset, the hydrology toolset found under the spatial analyst toolbox. The technical uses for the watershed analysis tool include predictive modeling for things like flooding events and determining snowmelt with the use of historical data and current conditions. This tool is most commonly used for delineating watersheds as the name implies, and determining the characteristics of drainage basins. The tool can generate many watersheds with the use of a DEM and calculate the direction of flow using the D8 integer raster method (ESRI, 2016). This image provides an example of some of the features that are needed and created using the watershed analysis tool (GIS Resources, 2013).

When working with ArcGIS Pro, some analyses require multiple data sets, but for the hydrology toolset, the only data that is required is a digital elevation model (DEM) raster layer. DEM raster files are considered to be continuous data since the elevation can take on any height over the ever-changing terrain (ESRI, n.d.). It is also classified as interval data since there is no absolute zero. Sea-level is the point in which elevation is determined above or below, which classes elevation data as interval data since it can be below or above sea-level. The watershed analysis tool is a very straightforward, easy-to-use tool when working with the appropriate data. Out of the thirteen tools that can be found within the hydrology toolset, five of these tools are required to run a successful watershed catchment area. This tool can be used to create predictive models for a variety of events such as flood management, snowmelt runoff, locating contamination sources, storm water drainage, and so on.

Next, let’s talk about the different types of outputs that are generated when using the five required tools to create a watershed. The first output layer is the filled DEM raster. This produces a DEM raster layer that has smooth even surfaces. Without this raster layer, there would be discontinuous drainage basins within the final output layer (ESRI, 2016). The next output that is created is the flow direction output. This simply calculates the direction water is flowing from each cell in the raster layer. This is created using a D8 method which is necessary to use when working with the watershed analysis. The third output layer that is created is the flow accumulation layer which calculates where the water is accumulating in each cell. The more cells that drain into other cells, raise the value of that cell which shows where the stream network is located (ESRI, 2016). The fourth layer that is created is the pour point feature layer. This has to be created if the data is not already given to the analyst. If the data already exists, then the snap pour point output is created. This snaps the pour point locations to the areas of greatest flow accumulation. This is necessary in order to determine where the water will be flowing from the watershed boundary to feed the downstream water source from that pour point location. The last output layer that is created once we have all of the other required layers, is the watershed analysis layer. This creates the watershed boundary and uses the D8 flow direction output layer that was created earlier to determine the boundary of each watershed that is created.

Analytical Procedures
The first thing that is important to know about creating a watershed analysis is the dataset that is needed. This analysis only requires the use of a DEM raster. This makes the entire process a rather easy, and straightforward one. Once the DEM is loaded into the platform, the rest of the parameters will all use this layer in some form or another. The workflow consists of a total of six steps. The first is to clip the DEM layer, if this is necessary. If one is working with a small area and the DEM raster is a large file, then clipping the data is highly recommended. This will allow for faster processing times. The next step in the workflow is to fill the DEM raster (ESRI, 2014). The fill process helps remove any low lying cells or high peaks that are out of place. There is also the option to save large bodies of water with the use of a Z limit parameter. All that is required for this is to insert the input parameter with the DEM raster layer, and set the Z limit to the desired depth if this is necessary. Once the fill output layer has been created, the next step of the workflow is to create the flow direction layer. The input parameter for the flow direction is the fill DEM layer that was just created. Before creating the flow direction layer, the flow direction layer type needs to be set to D8. This is required for the watershed analysis.
The next step is the flow accumulation. The input parameter for this layer is the flow direction layer and this needs to also be set to a D8 method. This allows the analyst to see where the water is collecting in the raster layer by determining how many cells drain into the neighboring cells. Where the accumulation is greatest, these cells receive higher values than the other cells which create a stream network (ESRI, 2014). The higher cells are typically given brighter colors like white that are surrounded by darker cells which represent lower values. The higher values determine where the stream is located, the lower values represent surface runoff (CrossTrainingVideos, 2015). Once the flow accumulation layer is created, the analyst needs to create some pour point features, if these have not already been provided. This feature is required to create the watershed analysis layer. Once the pour points are created, the snap pour point requires the flow accumulation in put and the pour point features that were just created. This snaps those points to the areas where accumulation is greatest to determine where the water will be flowing through that body of water. Once the points have been snapped, the last step in the workflow is to create the watershed analysis. The input parameters for this are the flow direction D8 raster and the snap pour points layer. This locates where the water is draining into a specific basin and determines where that water is flowing to feed the snapped pour point location.
Demonstration of the Tool
Fill Tool
The first step in the watershed analysis is to add a DEM raster of the area you want to create a watershed in (Merwade, 2012). Remember that this is the only dataset that is required to run a watershed analysis. Once the DEM raster is loaded into the map, the next step is to clip the layer to the desired extent to help the rest of the tools run faster. After this, the fill tool should be used on the new clipped DEM. What the fill tools does is it removes low-lying cells that might be surrounded by higher elevation cells. In other words, it fills any “holes” in the raster so that water can flow over the surface smoothly.
To use the tool all that the user has to do is insert the clipped DEM raster layer and rename the output with an appropriate name. The Z limit parameter is to specify depths that the analyst might want to keep in the raster layer such as lakes or large bodies of water (GIS Resources, 2013). For the example of this paper, the Z limit has been left as the default to fill all sinks in this layer. Here is an example of the input parameters as well as the result of the fill tool.
Flow Direction (D8 Method)
The next step in the workflow process is to create the flow direction analysis with the D8 integer raster method as previously mentioned. The flow direction tool creates an output raster layer that shows the user which way the water is flowing from the highest cell to the lowest neighboring cell with the use of the D8 method (Merwade, 2012). The D8 method is based on a binary system that calculates the direction water is flowing using exponential powers (CrossTrainingVideos, 2015). The large cell is made up of eight pixels that surround the center pixel and whichever pixel, or cell, that flow direction calculates the flow to, is given a number. These numbers include 1, 2, 4, 8, 16, 32, 64, 128, and 255 as the center pixel/cell (CrossTrainingVideos, 2015).
Flow Direction Tool
Once the tool has run, it produces a layer that color codes each direction the water is flowing that can be seen here in this figure. The numbers that the D8 raster creates for the direction of flow correlate with the compass directions that we are used to and can easily be substituted (ESRI, 2016). For example, 1 would be East, 32 would be Northwest, and so on.
Flow Accumulation Tool
Now that the flow direction raster layer has been created, the next step will be to figure out where the flow is accumulating in each cell with the flow accumulation tool. The accumulated flow is based on the number of cells that flow into each cell in the raster. This shows where the water is flowing and accumulating downslope. The cells where the water is accumulating have a much higher value than the surrounding cells (ESRI, 2014). This is how the accumulation tool determines where the stream network is. The input parameters for this tool include the flow direction layer that was just created and require an output name. Again, it is important to notice that the input flow direction type for this tool is best used with the D8 method as well (Merwade, 2012). The image provided shows us how the flow accumulation tool creates an image that shows us where the stream is being configured.
Snap Pour Point Tool
Before we can run the final step of our hydraulic model, we have to create pour points. Pour points are the features that water flows out of an area. All of the water below this point is fed from this pour point location (GIS Resources, 2013). This is an important feature to have because the pour point allows us to create a watershed to see where the water is coming from to feed this pour point, for the purpose of this study, the Bow River.
After the new pour point features have been created using the create features tool, we can use the snap pour point tool to locate the pour point features to the cell of highest accumulated flow (Merwade, 2012). Since there is only one pour point feature for this analysis, the extent of the output layer will remain the same as the accumulation raster, which is along the placement of the faded streamline seen in this figure. We are only creating the watershed for this given point. To use the snap pour point tool, the input raster parameter is the pour point feature layer that was just created, the pour point field can be left as the default OBJECT ID, the input accumulation raster should be the flow accumulation layer.
Watershed Tool
Our last step is to create a watershed boundary. This determines the contributing area above the pour point location for the Bearspaw dam. To do this we need to use the watershed analysis tool. We want to use the flow direction layer as the first input parameter for this tool because it shows the user which way the water is flowing (Merwade, 2012). This helps the tool to determine where the boundary should be for a given catchment area. The watershed boundary is the line in which it divides one catchment area from another. The second parameter requires the pour point feature layer that was just created, the pour point field can again be left as the default OBJECT ID. When the tool runs, it produces a raster feature of the watershed boundary. We want to turn this raster into a polygon so all that is needed is to use the raster to polygon tool to create a polygon feature of the watershed boundary (Merwade, 2012). The watershed can be edited any way you see fit. The image here shows us how the watershed layer generates the entire catchment area for this pour point location that was created just before the Bearspaw Dam.
The final result that is created after using all of the required tools as mentioned earlier is the watershed boundary layer. This shows us where all of the water is draining into one drainage basin to feed the pourpoint that was created just before the Bearspaw Dam. We can see that the main source of water that feeds the Bow River is snowmelt from the rocky mountains.
Conclusion
Before using this tool, I did not know much about watersheds or how there could be multiple watersheds within a larger watershed, like the Bow River Subbasin. The hydrology toolset has opened my eyes to the possibilities that ArcGIS can play in the environmental sector. The final layer that is created with the watershed analysis tool provides users with a very useful source of information. There are a variety of purposes that the watershed tool can be used to determine such as stream flow, floodplain management, and monitoring geologic hazards due to flooding events. There is one example of scientists using this tool as a service accessed through Web GIS. This services is known as hydrologic modeling as a service (HMaaS). The United Nations is looking at the use of HMaaS to help developing countries. One of the challenges that developing countries face is being able to maintain their own hydrologic models due to a lack of maintenance and costs, as well as the capacity needed to run models (Alcantara et al., 2019). Advancements like these is what makes ArcGIS such an advanced and universal tool.
The watershed tool holds a great deal of value for those in the hydrology sector and I hope one day I can gain more experience working with this tool to learn more about how it is used in the real world. If I were to run this tool again, I would create more pour points and place them along multiple spots within river networks to see if the tool would create multiple drainage basins. I would also use the tool again to locate areas where there are sinks, instead of using the tool to fill them in. It would be great to see where water is running underground to determine where there might be karst features for the caving community to explore. Having locations where existing sinks are located and configuring the sink tool to compare the accuracy of the tool would make for a very interesting study. Overall, the tools were very easy to use and the results were easy to comprehend.
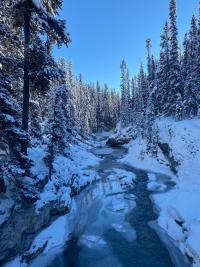
Final Map of the Watershed Boundaries created for the City of Calgary using ArcGIS Pro.
Bibliography
Alcantara, M. A., Nelson, E. J., Shakya, K., Edwards, C., Roberts, W., Krewson, C., Ames, D. P., Jones, N. L., and Gutierrez, A. (2019.) Hydrologic Modeling as a Service (HMaaS): A New Approach to Address Hydroinformatic Challenges in Developing Countries. Frontiers in Environmental Science. doi: https://www.frontiersin.org/articles/10.3389/fenvs.2019.00158/full
CrossTrainingVideos. (2015). GIS 4.7.6 Understanding Flow Direction [CrossTrainingVideos]. YouTube. doi: https://www.youtube.com/watch?v=tCRzkbq7coY
ESRI. (n.d.) Exploring digital elevation models. doi: https://resources.arcgis.com/en/help/main/10.2/index.html#/Exploring_Digital_Elevation_Models_DEM/009z0000005n000000/
ESRI. (2016.) How To: Create a watershed model using the Hydrology toolset. doi: https://support.esri.com/en/technical-article/000012346
ESRI. (2014.) An overview of the Hydrology toolset. ArcGIS Resources. doi: https://resources.arcgis.com/en/help/main/10.2/index.html#/An_overview_of_the_Hydrology_tools/009z0000004w000000/
GIS Resources. (2013.) Watershed Analysis: What, How, Influencing Factors & Applications. GIS Resources. doi: https://www.gisresources.com/giswatershedwatershed-analysis/
Merwade, V. (2012.) Stream Network and Watershed Delineation using Spatial Analyst Hydrology Tools. doi: https://web.ics.purdue.edu/~vmerwade/education/hydrology.pdf


